
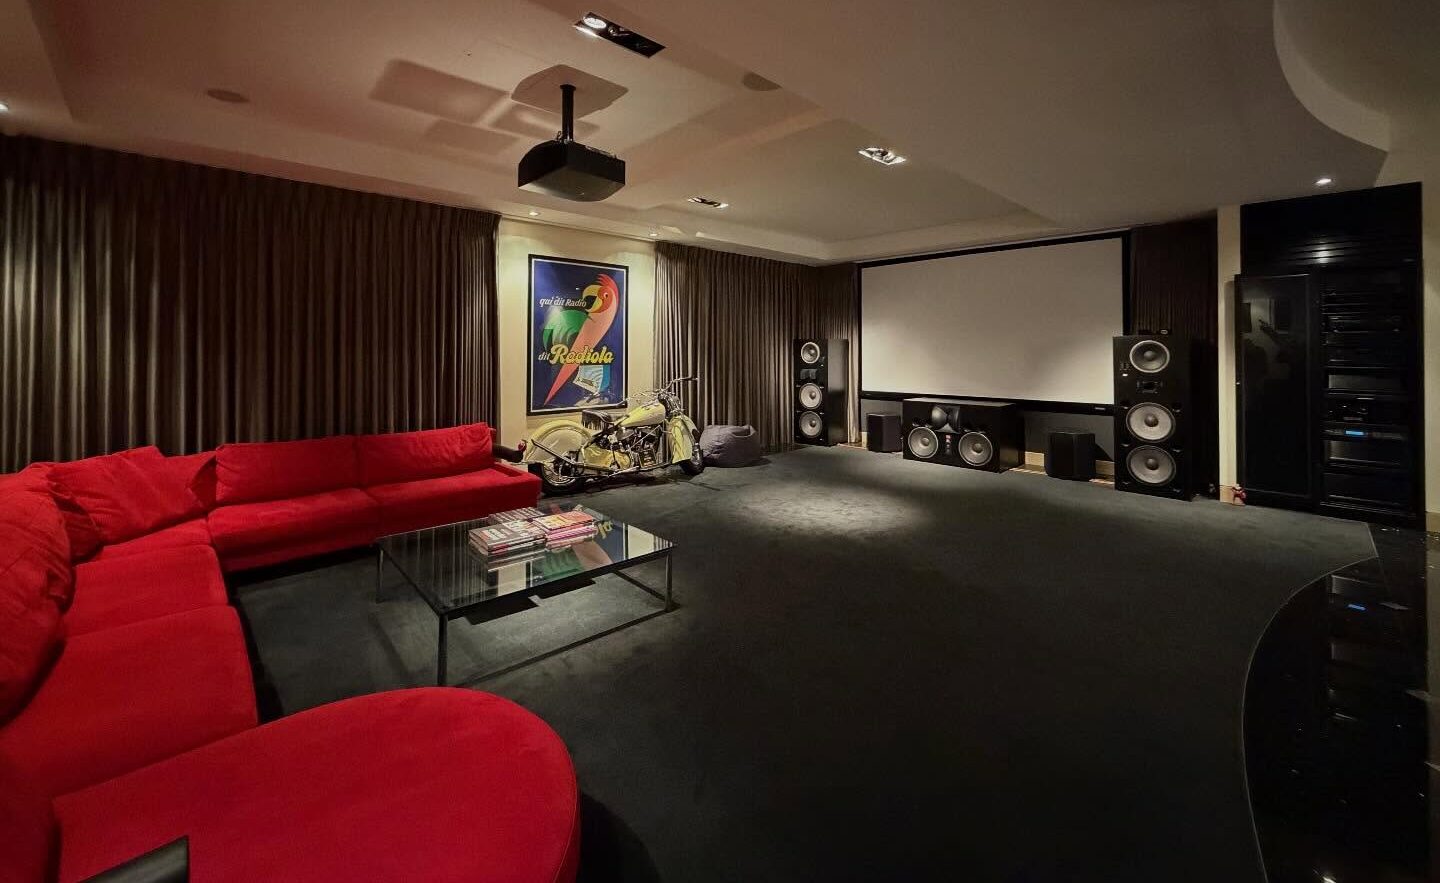
I recently walked into a Sydney media room that cost more than $180,000. The leather recliners were beautiful, and the projector was excellent, but the bass shook the floor above, dialogue bounced off bare walls, and the back row lost the bottom of the screen.
It looked luxurious. It performed badly.
That failure is common because luxury is treated as styling, not engineering. A serious media room has to work as a performance space first, then as an interior.
Set the targets for viewing angle, screen brightness, background noise, and speaker positions before you pick fabric, timber, or lighting. Lock those numbers early so the builder, integrator, and designer work from the same brief.
What Defines A Luxury Media Room?
A luxury media room is a controlled performance space first, and a beautiful room second.
It is built for movies, sport, music, and gaming, then tuned so those uses feel consistent every time. It differs from a living room in four measurable ways: noise isolation, light control, precise speaker geometry, and screen sizing based on viewing distance.
In Australian detached homes and high-end apartments, the NCC 2022 Housing Provisions reference Rw+Ctr ratings, which are laboratory measures of sound reduction that include bass effects. The code also flags the high-bass output of home-theatre systems as a nuisance risk, which makes early isolation planning essential.
Your drawings should specify viewing angles, speaker and seating coordinates, door seals, lighting zones, and the materials schedule before framing begins. If those details are left to site decisions, the room usually drifts toward compromise.
Three Benefits For Australian Homes
When the room is planned properly, it improves daily living as much as it improves movie night.
The first benefit is containment. Proper isolation keeps bass inside the room instead of sending it through bedrooms, living areas, and neighbouring walls. CSR Gyprock has tested Cinema Wall assemblies as high as Rw 77, which shows that strong residential isolation is achievable when the wall build-up is detailed correctly.
The second benefit is consistency. You are not guessing whether the front row sounds better than the back row or whether a bright scene will wash out at night. You are measuring reference level, screen luminance, and frequency response, then tuning the room to meet the brief.
The third benefit is flexibility. One room can handle films, State of Origin, gaming, and concerts with a few control presets and a stable network. Netflix recommends at least 15 Mbps for a single 4K UHD stream, so every fixed device should be on Ethernet rather than Wi-Fi.
Plan The Shell
Good room size and clear targets solve problems before equipment arrives.
For a single-row layout, aim for about 4.5 m long by 3.8 m wide by 2.7 m high. For two rows with a riser, a room closer to 6.5 m by 4.5 m with a 2.9 m ceiling gives better sightlines, cleaner speaker placement, and more useful circulation.
Prefer room ratios within accepted Bolt or Sepmeyer families so low-frequency room modes are spread more evenly. Even then, treatment and subwoofer placement still matter. Avoid pushing the main row hard against the back wall, where bass peaks and nulls are usually strongest.
SMPTE EG-18 recommends a minimum 30 degree horizontal viewing angle, while THX advises designers to accommodate 36 degrees. Many home-cinema designers aim for 36 to 40 degrees. SMPTE 196M specifies a nominal screen luminance of 16 foot-lamberts, which is a screen-brightness measure, at screen centre for dark-room projection.
Write those targets directly on the drawings along with conduit routes, projector throw, rack location, and HVAC return locations away from the listening area. A one-page performance brief can stop weeks of redesign later.
Build Quiet
Isolation works only when walls, doors, ceiling, and air movement are treated as one system.
The formula is simple: mass, decoupling, airtightness, and quiet air. That usually means double-stud or staggered-stud walls, dense plasterboard, acoustic insulation, resilient mounting, and sealed penetrations. Pair that with a solid-core acoustic door, full perimeter seals, and a drop seal at the threshold.
Do not ignore the ceiling. In a two-storey home, low bass will travel through joists unless the ceiling assembly is detailed with the same care as the walls. If the shell leaks, expensive speakers will only make the problem easier to hear.
For HVAC, specify low-velocity ducts, lined plenums, and silencers so the room stays quiet with the system running. NC-25, a very low background-noise target, is a good benchmark for a residential media room. Dolby uses NC-25 in compact-studio guidance, and it is a useful reference point here as well.
Lay Out The Sound
Speaker placement has more impact on immersion than buying a costlier amplifier.
Start with a real layout such as 5.1.4 or 7.1.4. Dolby uses X.Y.Z notation, which means ear-level speakers, subwoofers, and height speakers. That notation matters because every extra channel changes wiring, amplifier count, and mounting positions.
In a 5.1.4 room, the bed-layer speakers sit at ear height and aim toward the main seats, while four height channels follow Dolby guidance for elevation and azimuth. The LCR speakers, meaning left, centre, and right, should sit behind an acoustically transparent screen when possible so dialogue stays locked to the image.
Low frequencies need their own plan. Harman research by Todd Welti shows that two or more subwoofers placed in prescribed locations create smoother bass across several seats than a single subwoofer can. Opposing-wall or mid-wall positions are common starting points before equalisation.
After placement, calibrate wideband pink noise to about 79 to 82 dB SPL(C) at the main seat, then equalise the combined subwoofer response. Treat first-reflection points on the side walls and ceiling, found with the mirror method, to improve clarity and imaging without making the room sound dead.
Home Cinema System
Pre-matched system packs reduce risk, but they still need room-specific setup.
Coordinating speakers, amplification, and cabling across a Dolby Atmos room can slow a project when several trades are already working to a tight programme. A pre-matched pack shortens procurement and lowers the chance of pairing speakers with different sensitivity, voicing, or mounting needs.
For projects that need a proven path to commissioning, Amplify AV offers pre-matched packs built around common Atmos layouts and compatible amplification. That shortens procurement, reduces compatibility guesswork, and gives trades a clearer equipment list when rack space, cabling, and speaker positions are already locked. For that reason, many builders choose a home cinema system package that can be commissioned on schedule. Even with a matched pack, you still need sensible subwoofer placement, acoustic treatment, and final calibration in the room you actually built.
Picture Decisions
Choose the screen around room conditions and seating distance, not showroom marketing.
If you want 120 inches or more and can fully control light, a projector is still the premium answer. In a brighter or smaller multi-use room, a premium OLED or MiniLED TV will usually deliver stronger contrast and HDR with less fuss. If you are torn between the two, decide which compromise annoys you less, stricter light control or a smaller image.
Keep the primary row within a 30 to 40 degree horizontal field of view and make sure any back row clears the front row without losing the bottom of the screen. An acoustically transparent screen lets the front speakers sit at cinema-correct height behind the image, which improves both dialogue localisation and front-stage scale.
Plan infrastructure early. Reserve conduit for fibre HDMI or active optical cable, especially on longer projector throws. Ultra High Speed HDMI 2.1 at 48 Gbps supports uncompressed 8K up to 60 Hz and 4K up to 120 Hz, which makes cable choice and pathway planning hard to retrofit later.
Black out the front wall and keep glossy finishes out of the projector light path. Reflections steal contrast long before the calibrator arrives.
Lighting, Controls, And Power
The best control systems make the room feel effortless and keep the picture clean.
Divide lighting into useful zones: wall sconces, dimmable downlights kept off the screen plane, LED step lights, concealed coves, and task lights at a bar or rear bench. Then programme clear scenes such as Pre-Show, Movie, Intermission, and Clean so the room behaves the same way every time.
Use warm light between 2700 and 3000 K, high-CRI fittings, silent drivers, and low-flicker dimming. During playback, 1 to 5 lux is usually enough if only egress lighting remains active. Pre-show levels around 10 to 20 lux work well for reading menus and finding seats.
For power, coordinate with a licensed electrician to AS/NZS 3000, dedicate circuits for AV equipment, and add surge protection. Hard-wire Ethernet to every fixed source, label both ends of every cable, and leave service loops so future changes do not require re-pulling the entire run.
Team, Timeline, And Budget Guardrails
A clear brief and the right trade sequence save more money than a late equipment discount.
For a serious build, involve an architect or interior designer, a CEDIA-certified integrator, the builder, cabinetmaker, electrician, HVAC contractor, and, for higher isolation goals, an acoustics consultant. Each trade affects the others, especially around framing, duct routes, seating platforms, and rack ventilation.
Use simple milestones: concept, design, rough-in, finishes, and commissioning. Freeze the room targets during concept stage so door types, seating positions, cable paths, and joinery are not redrawn halfway through construction.
If the budget tightens, protect isolation, power, and acoustic treatment first. Displays and speakers can be upgraded later. Rebuilding the shell after plaster is far slower and far more expensive.
Custom Furniture Sydney
Custom joinery should hide complexity, support acoustics, and make the room easier to live with.
Off-the-shelf AV cabinets rarely match real rack depth, amplifier heat, or cable volume. Built-ins sized to your actual equipment allow front-to-rear airflow, rear service access, and tidy cable management instead of visible patch leads, cramped shelves, and overheating.
Fabric-wrapped doors and panels can also work as acoustic absorption, which lets treatment disappear into the room design instead of reading like an afterthought. Use matte or low-sheen finishes on every surface in the projector path so reflections do not wash out the image.
Local cabinetmakers also solve awkward room shapes, stair bulkheads, and tiered seating better than flat-pack furniture. For bespoke joinery with proper ventilation and Australian hardwood finishes, the brief often calls for precisely sized lowlines, wall units, or risers that hide gear, improve airflow, and keep cable runs tidy. That is why many owners seek custom furniture Sydney solutions from Naturally Timber, which builds media-room pieces in Sydney, from lowlines and wall units to risers, chaise modules, and ottomans, with detailing that helps keep gear cool, hidden, and rattle-free.
Finish the floor with dense underlay carpet to reduce high-frequency flutter without stripping the room of all life. Good furniture should improve comfort, sightlines, and noise control at the same time.
Commissioning: Prove It Performs
A media room is finished only when the measurements match the brief.
On the audio side, verify channel trims, delays, frequency response, and reverberation time, or RT decay, then confirm that bass stays even across the main seats. Without commissioning, the room is only installed, not finished.
On video, confirm HDR tone mapping on a TV or measure projection brightness to roughly 14 to 16 foot-lamberts at screen centre. Then check background noise against the NC target, confirm door seals, verify rack temperatures, and hand over a quick-start guide with source selection, scene presets, and basic maintenance notes.
FAQ
The most common decisions come down to room size, display choice, sound layout, streaming stability, and retrofit limits.
What Room Size Works For A Luxury Media Room?
For one row of seating, about 4.5 by 3.8 metres with a 2.7-metre ceiling is a practical starting point. For two rows with a riser, aim closer to 6.5 by 4.5 metres with a 2.9-metre ceiling so sightlines and Dolby speaker angles still work.
Projector Or TV, Which Is Better?
If you want 120 inches or more and can control light properly, a projector with an acoustically transparent screen is the premium option. If the room is brighter, smaller, or used casually during the day, a premium OLED or MiniLED TV will usually deliver better contrast with fewer compromises.
Is Dolby Atmos Essential?
For genuine immersion, yes. A 5.1.4 or 7.1.4 layout is the residential sweet spot because overhead effects add spatial cues that stereo and standard surround cannot create. Adding the wiring and speaker positions during construction is much cheaper than retrofitting them later.
How Loud Is Reference Level At Home?
Dolby recommends calibrating wideband pink noise to roughly 79 to 82 dB SPL(C) at the main listening seat in home environments. Day-to-day listening can sit well below that level, but proper calibration makes sure the system stays balanced when you do turn it up.
How Fast Should Internet Be For 4K Streaming?
Plan for at least 15 Mbps per concurrent 4K stream and use wired Ethernet for every fixed player, console, and streaming box. Wi-Fi is fine for phones and tablets, but fixed devices should not depend on it.
Can An Existing Room Be Retrofitted?
Yes. Start with the upgrades that deliver the biggest gains: door sealing, acoustic treatment, sensible subwoofer placement, and calibration. Larger isolation work, such as double-stud walls or a decoupled ceiling, may wait for a broader renovation, but meaningful improvement is still possible in stages.
You Might Also Like

