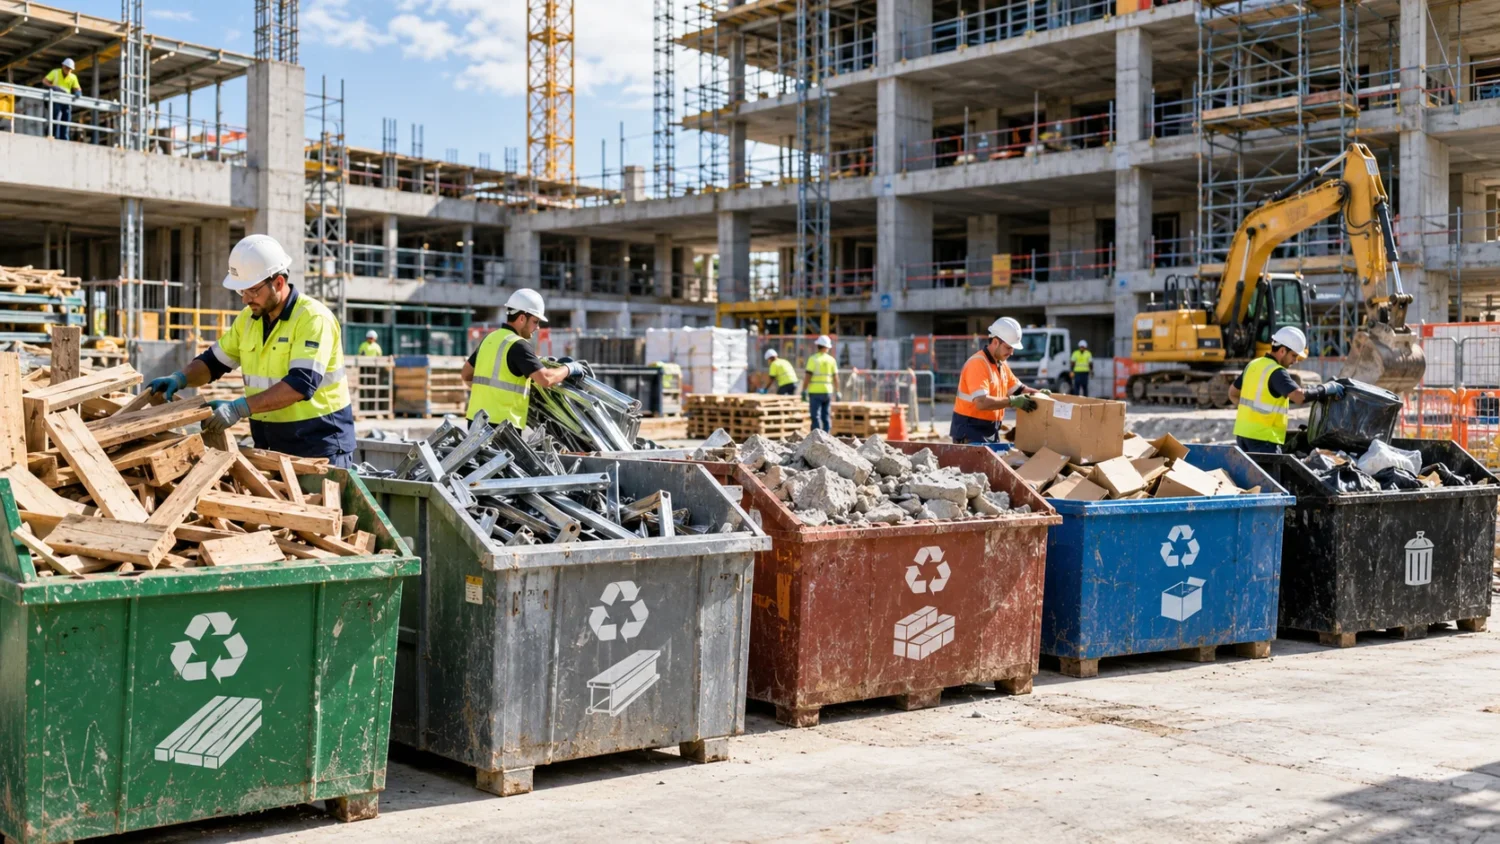

A custom home build generates far more debris than most owners expect. Framing offcuts, packaging from every fixture, broken tile, drywall scraps: it adds up fast, often before the roof goes on. Getting a handle on waste management early keeps a site safe and keeps neighbours happy, while stopping the budget from bleeding into unplanned skip hire and tip fees. This guide walks through what actually works on a residential build, from the first bin order to the final clean-up, and where the biggest savings tend to hide. None of it requires specialist knowledge, just a bit of planning before the trucks start arriving.
Waste rarely gets attention until it becomes a problem, yet the decisions that create the most rubbish happen at the drawing board, not on site. A project home draws from a standard set of finishes, and a builder who has ordered the same materials a hundred times before knows roughly what’ll end up in the bin. A custom build works differently. Because the custom home building process starts from a blank site and a personal brief, material quantities are harder to predict, and offcuts are less standardised. A generic waste plan, copied from the last job, tends to underestimate what actually gets thrown away.
Start The Plan Before The First Delivery Arrives
Most waste blowouts trace back to a missing plan, not a messy crew. Before the first delivery truck turns up, walk through the drawings with your builder and ask which trades will generate the heaviest volumes at each stage. Framing and roofing usually front-load the timber and metal offcuts. Fit-out stages bring a different mix, with packaging, tile and stone offcuts, leftover paint and general rubbish from the daily clean-up. Sit down and estimate roughly how many bins each stage will need, then book them in advance rather than scrambling once a skip overflows on a Friday afternoon. A one-page schedule pinned up in the site shed, listing what goes where and when the next pickup is due, does more to control costs than any amount of after-the-fact sorting once the mess has already piled up.
It also helps to name someone on site as the person responsible for waste, even if that’s just one of the trade supervisors on rotation. Without a clear owner, bins get overloaded, and the wrong materials can end up in the wrong container. Often nobody notices until a pickup gets refused for contamination, and that refusal costs both time and money. It’s entirely avoidable with a five-minute conversation at the start of each stage.
Know What You’re Actually Throwing Away
A typical custom build produces several distinct waste streams, and each behaves differently once it leaves the property. Timber and engineered wood products make up a large share of early-stage debris, particularly during framing and truss installation. Plasterboard and other gypsum products follow during the fit-out, alongside metal offcuts from plumbing, electrical and structural work. Packaging piles up the moment appliances and fixtures start arriving, from cardboard boxes to polystyrene padding wedged around glass and stone. Concrete and masonry waste tends to spike during footings and slab work, then again during paving and landscaping near the end of the build.
Understanding which streams a builder can separate at the source, rather than tipping everything into one bin, changes how much material ends up in landfill and how much comes back as a rebate on the disposal account. Clean, single-material loads are almost always cheaper to process than mixed skips, and some materials, like scrap metal, can actually be sold rather than dumped.
Volume also varies with the size and complexity of the home. A single-storey build on a simple slab produces a different waste profile than a multi-level home with a basement and several different roof lines. Asking your builder for a rough breakdown of expected waste by stage, even a loose estimate, gives you something to measure against once the bins start filling up.
Set Up Sorting And Storage On Site
Space is usually tighter on a custom lot than on a display village block, so sorting has to be practical, not ideal. Even a couple of labelled bins, one for general waste and one for clean timber, can cut disposal costs meaningfully, because a single-material load is treated differently to a mixed one at most transfer stations. Position bins close to where each trade actually works rather than tucked in the far corner of the block, or they simply won’t get used once the crew is under time pressure.
It’s worth raising bin placement during the same conversation where you review the overall cost of building a custom home, since waste handling fees are a line item that catches a lot of owners off guard partway through a project. A bin schedule that matches the build program, rather than one giant skip sitting there for months, costs less overall.
Understand The Council And Environmental Rules
Council requirements for construction waste vary a good deal between municipalities, and ignoring them is an easy way to pick up a fine partway through a build. Some councils cap how long a bin can sit on a verge, while others require a permit before any container touches the footpath. A handful even restrict the hours a skip can be swapped out because of noise. Checking these rules before the first bin arrives saves an awkward call from the council later.
It also pays to look beyond local rules to the bigger picture of how construction debris is handled once it leaves the site. The Environmental Protection Agency’s guidance on construction and demolition materials lays out how much of this debris can realistically be diverted from landfill rather than dumped, and the figures are a useful benchmark even for a single residential project, not just a large commercial site.
Choose A Waste Partner That Actually Recovers Material
Waste contractors sort materials very differently once a bin leaves your property, and that difference matters if diversion from landfill is the goal. Ask a prospective provider what percentage of mixed construction waste they actually recover, and whether that figure is verified or just an estimate they quote every client. A contractor who can answer specifically, with numbers, is usually worth paying slightly more for.
International guidance on this, such as the resource efficiency guidance published by WRAP, points out that procurement conversations, not just on-site sorting, decide how much material eventually gets a second life. Choosing a haulier purely because they’re cheapest per bin, without asking these questions, often becomes a false economy once landfill levies and re-hire fees are added at the end of the job.
Reduce Before You Recycle
Recycling gets most of the attention, yet reduction is the cheaper lever and the one most owners overlook entirely. Ordering materials to the actual dimensions of a job, rather than rounding up “to be safe,” trims offcuts before they’re even generated. Asking suppliers to take back pallets and unused stock is another simple habit that many builders never bother to negotiate, even though most suppliers will agree if asked directly.
Salvaging usable fittings, doors or timber from a renovation and finding them a second life elsewhere on the block, rather than sending them straight to a skip by default, can shave real money off both material costs and disposal fees over the length of a project. A door that doesn’t suit the new layout might still work as a shed door or a garage store cupboard, and that’s one less item taking up space in a bin.
Handle Hazardous Materials Separately
Some materials on a construction site need to stay well clear of a general waste bin. Old paint, solvents, adhesives and some treated timber count as hazardous waste in most jurisdictions and need separate collection and disposal. Mixing these materials into a general skip risks contamination fees, and in some cases it’s simply illegal. A short conversation with your waste contractor about what counts as hazardous on your specific job, before you open the first can of paint, can avoid an unpleasant surprise on the final invoice. Most areas also run periodic drop-off days for household chemicals, which is often the cheapest route for smaller quantities left over once a project wraps up.
Keep The Site Clean Through Handover
Waste management doesn’t stop once the frame is up, and the roof is on. Final fix stages and cabinetry installs generate their own mess, and landscaping adds even more at the end, often just as everyone’s attention has shifted towards finishing touches rather than site tidiness. Booking a smaller bin for this tail end of the project, rather than relying on the same large skip used during framing, usually works out cheaper and keeps the site presentable for the final walkthrough.
A clean handover says something about how the whole build was run, and clients notice it, even if they can’t quite explain why a tidy site feels more trustworthy than a messy one. Getting waste right from the first delivery to the last skip pickup isn’t glamorous work, but it’s one of the few parts of a custom build where good planning pays for itself almost immediately.
You Might Also Like